![]()
After activation of the location folders in the Project Context, the attributes Complete Associated Location and Associated Location will be available in the attribute selection for the column display in both dialog areas.
2.1 Dialog Elements
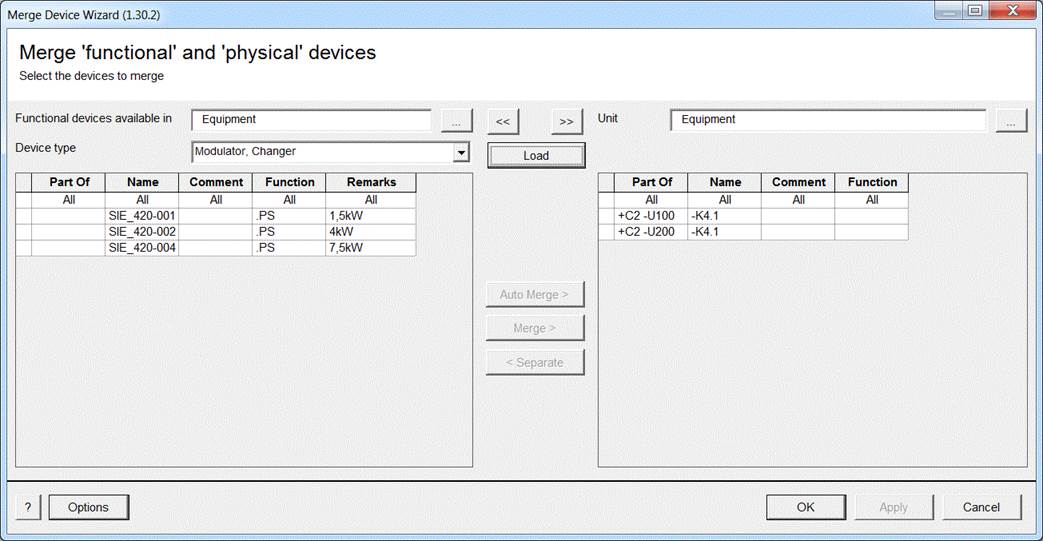
The dialog is subdivided into two logical areas:
· The left part of the dialog is for the selection and display of functional devices.
· The right part of the dialog represents the physical, real devices.
Upon selecting the functional and physical devices in the list areas, the buttons Auto Merge, Merge and Separate are activated or deactivated.
Both parts contain filtering elements enabling to limit the device and to organize it more clearly. The column attributes displayed in the selection lists may be configured using selection dialogs. Once the filter elements are selected, the selection lists may be filled clicking the button Load.
|
|
After activation of the location folders in the Project Context, the attributes Complete Associated Location and Associated Location will be available in the attribute selection for the column display in both dialog areas. |
After selecting a device, the right part of the dialog contains an additional table for automation devices and I/O boards with data of related channels:
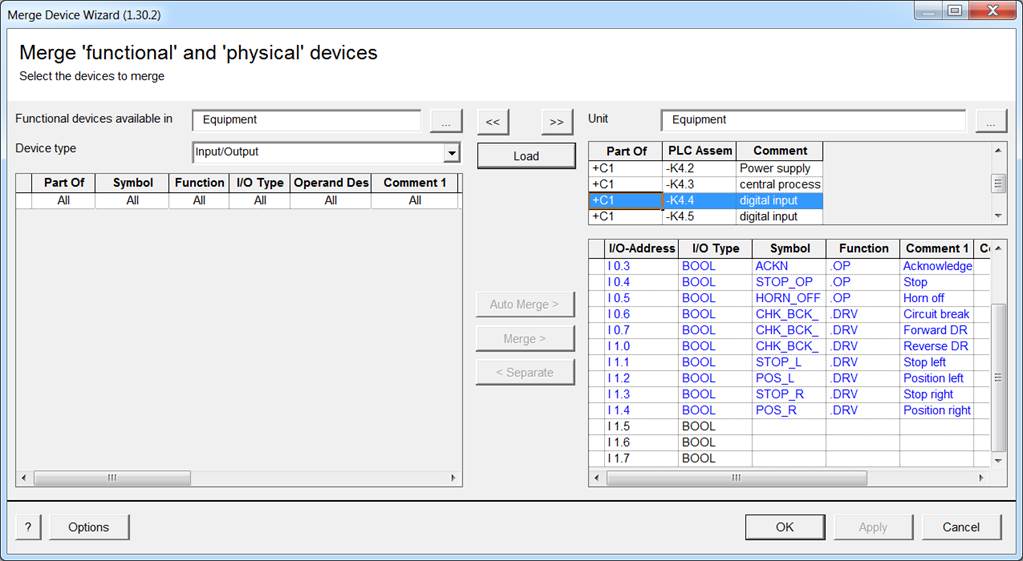
The attribute content of channels already assigned are displayed in blue color. After selecting functional and physical devices, the buttons Auto Merge, Merge, and Separate will be activated or deactivated.
Click on the Options button to make settings for the wizard.
Click OK to terminate the assistant storing the created data.
Click on the Apply button to store the created data and to continue to work with the wizard.
Cancel results in the following discarding dialog.
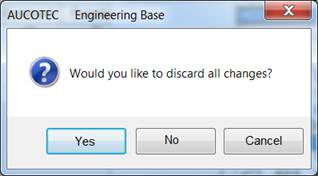
· Yes terminates the assistant and the project data remain in the status before the assistant was started.
· No terminates the assistant keeping the data created.
· Cancel leads you back to the dialog Merge Device Wizard.