1.2 The Block Mapping Assistant
When importing bulk data, the Block Mapping Assistant of the assistant Advanced CAD import enables easy mapping of objects and attributes in the imported drawings with Engineering Base objects and attributes.
Prerequisites
· Import of drawing(s) with the Advanced CAD import assistant into the Engineering Base project.
· The following options of the Advanced CAD import must be activated:
· Activation of the layer mapping under General/Graphic so that unmapped blocks are shown in red in the drawing.
· Activation of Convert blocks to Visio shapes and items under General/Blocks and Attributes.
· To map the blocks under General/Blocks and Attributes, Add block names to this list during import must be marked.
· To map the attributes under General/Blocks and Attributes, Add attribute names to this list during import must be marked.
How to execute the Block Mapping Assistant:
1. Use the Engineering Base-Explorer, folder Documents, to select a sheet that was imported with the Advanced CAD Import assistant under the options specified in Prerequisites.
2. Open the sheet with a double click, or click on Open Sheet with Visio in the context menu.
The sheet is opened, and all unmapped blocks are marked in red.
3. Mark a block and click on Select assistant in the context menu.
4. In the Assistant selection dialog, select Advanced CAD Import/Block Mapping Assistant and click on Start.
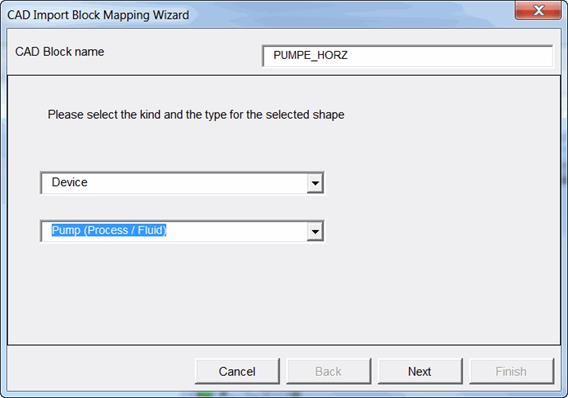
The dialog CAD Import Block Mapping Assistant is opened.
The name of the selected block is shown in the field CAD block name.
The assistant is terminated with Cancel.
Next opens the second dialog of the assistant.
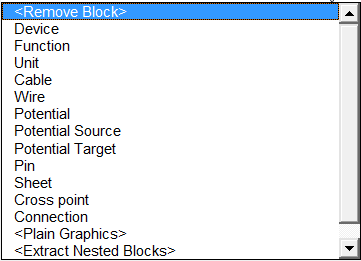
5. In the first input field, assign the block an Engineering Base type (according to the global type definition =CID). With a click into the input field you open a selection window with the possible types.
6. In the second input field, assign an object type to the block. With a click into the input field, the object types corresponding to the Engineering Base type are shown for selection.
7. Click on Next.
The second dialog of the assistant is displayed.
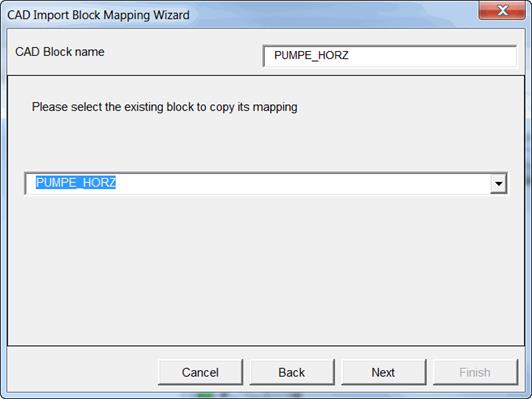
Cancel terminates the assistant.
Back returns to the last dialog of the assistant.
Next opens the third dialog of the assistant, which enables the assignment of block attributes to Engineering Base attributes.
8. Select an already defined mapping if required. Click on the input field to display a list of the already created mappings.
9. Click on Next to open the third dialog of the assistant.
The third dialog of the assistant is displayed.
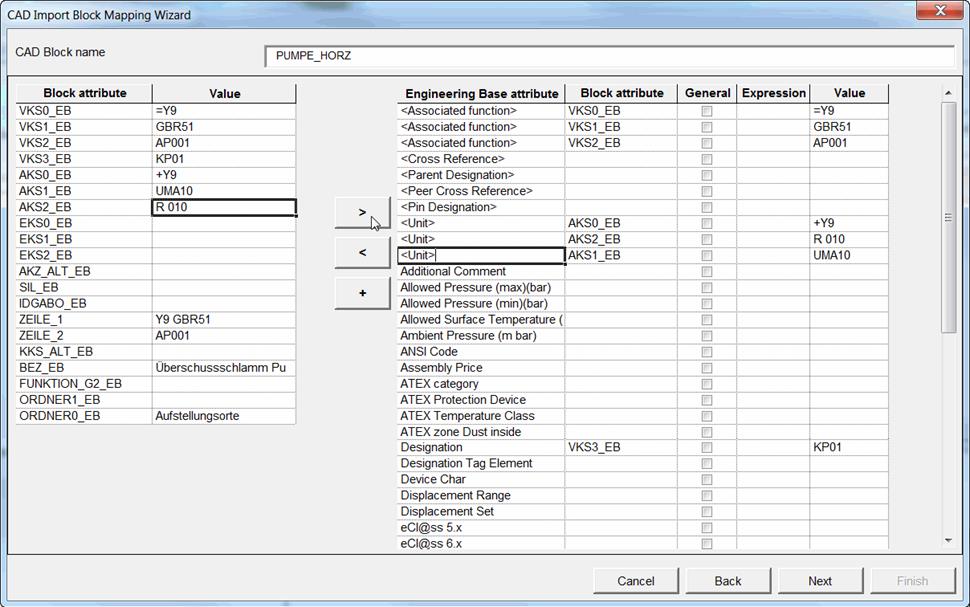
The name of the marked block is shown in the field CAD Block Name.
Cancel terminates the assistant.
Back returns to the last dialog of the assistant.
Next opens the fourth dialog of the assistant, where you can start the reimport.
Columns and their meaning
|
Block attribute |
Name of the block attribute in the CAD drawing. |
|
Value |
Name of the block attribute. |
|
Engineering Base attribute |
Attributes specified for the selected object type. |
|
General |
You can mark the checkbox if the assignment is to be valid for all corresponding symbols (global assignment). |
|
Expression |
To restrict the content of the block attribute, you can here use all VBA functions as well as some other functions. See Mapping of Attributes. |
Possible actions:
|
> |
Assign the marked block attribute to a marked Engineering Base attribute. |
|
< |
Undo the assignment to the marked Engineering Base attribute. |
|
+ |
Duplicate the line of the marked Engineering Base attribute |
Assignment of the block attributes to Engineering Base attributes
Mark a block attribute or a value on the left-hand side of the dialog
Mark the desired Engineering Base attribute
Click on > to carry out the assignment. The name and the value of the block attribute are adopted into the corresponding columns on the right-hand side. If the column Expression contains a function, then the column Value on the right shows the result of the function.
10. Assign the block attributes to the desired Engineering Base attributes.
11. Click on Next to terminate the mapping.
The fourth dialog of the assistant is opened.
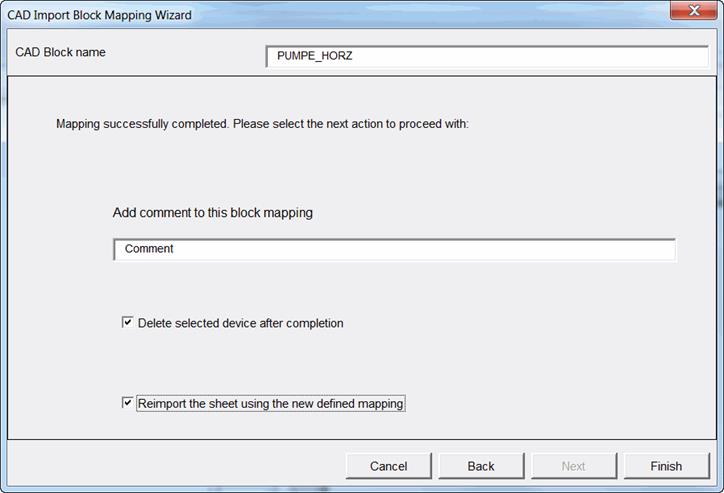
The name of the marked block is shown in the field CAD Block Name.
Cancel terminates the assistant.
Back returns to the last dialog of the assistant.
Finish terminates the Block Mapping assistant.
12. Enter a comment for the mapping just executed. This makes sense if you want to use the mapping as template.
13. Select the desired options:
· Delete device after completion: The object imported with the CAD import is deleted in the Engineering Base project. This option should always be marked if the sheet with the newly defined mapping is to be reimported.
If no subsequent reimport is carried out, then the edited CAD block is shown in the imported drawing only as shape.
· Reimport sheet with the newly defined mapping: The CAD drawing is reimported with the mapping, and the objects are created in the Engineering Base project.
14. Click on Finish to terminate the assistant.
Depending on the selected setting, the mapping is stored in the options of the assistant Advanced CAD Import, in the project or in the database.