![]()
The automatic installation of the .NET Framework requires an active Internet connection!
3 Installation – System Requirements Fulfilled
The SQL Server 2017 silent installation with the AUCOTEC settings is started automatically via the Autorun function.
Please start setup.exe on the root of the DVD drive via a right-click with your mouse.
|
|
The automatic installation of the .NET Framework requires an active Internet connection! |
Immediately after starting the installation, the following wait dialog will be displayed:
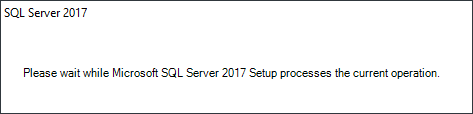
It will also be displayed during some further steps in the installation process. After a brief waiting period, the opening dialog of the setup will be opened.
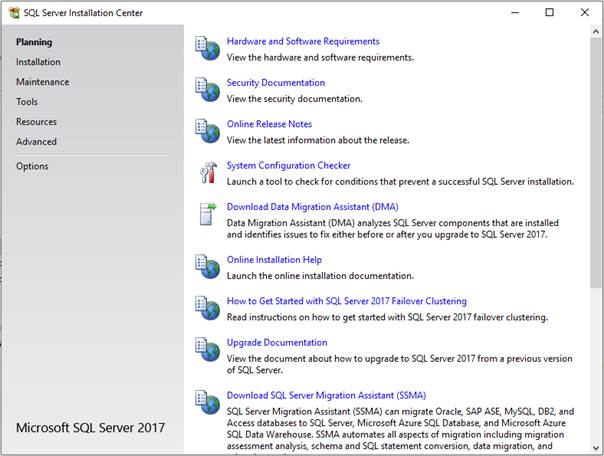
The opening dialog offers the possibility to access different information and help documents. Furthermore, during this step you may already run the System Configuration Checker which verifies whether there are any system conditions that might impede a successful installation of the SQL Server.
However, this step is not mandatory at this point, as it will anyway be carried out stepwise during the setup process.
|
|
For Engineering Base, the English SQL Server will be installed. This will not have any impact on working with a German version of Engineering Base. |
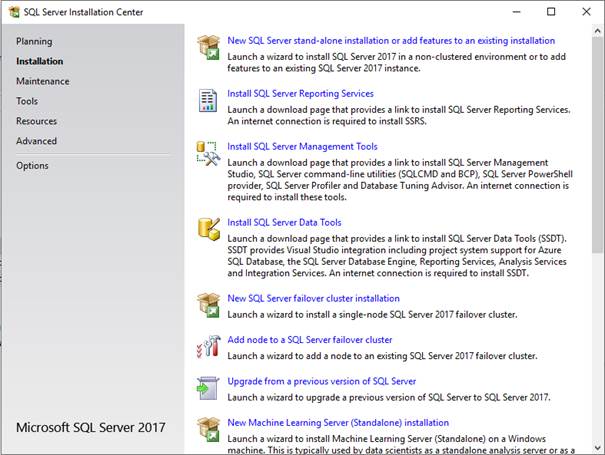
For the requested new installation, click Installation on the menu bar on the left-hand side, then select New SQL Server stand-alone installation or add features to an existing installation.
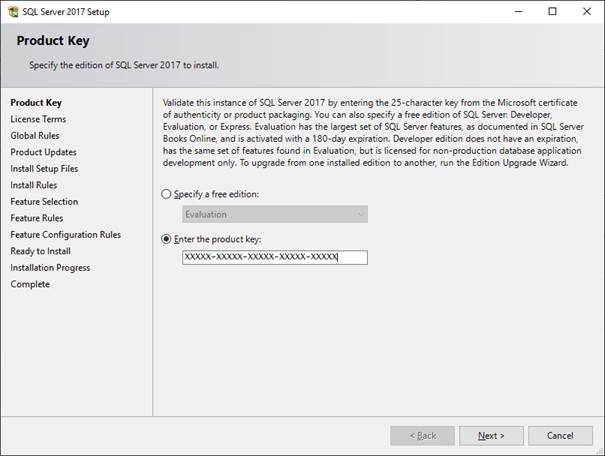
In the following dialog, you will be prompted to enter your product key. After having entered your valid product key, click Next>.
|
|
For the installation of the SQL Server which has been delivered by AUCOTEC, the product key will already be inserted. |
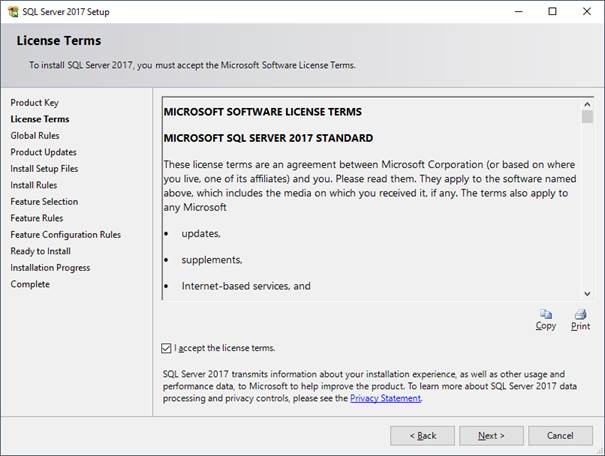
Next, you will be prompted to accept the license terms. Read the license terms carefully, accept them and click Next>.
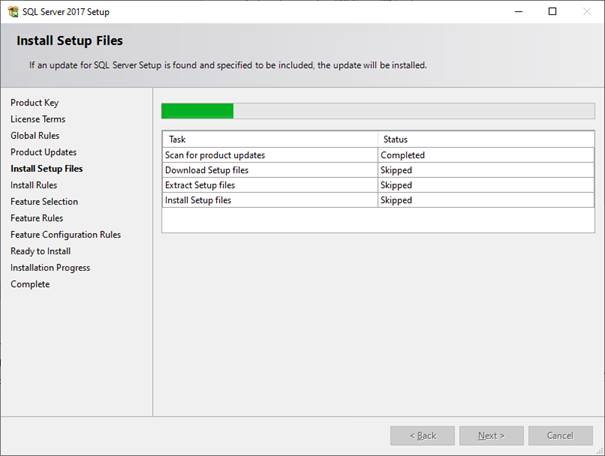
If no exceptions have occurred, the setup process will automatically proceed from the step Global Rules to the step Product Updates, and the search for product updates will be started. To ensure server security and performance, the latest updates should always be installed. If no updates are available, the setup process will also skip this step and continue with the step Install Setup Files.
Click Next>.
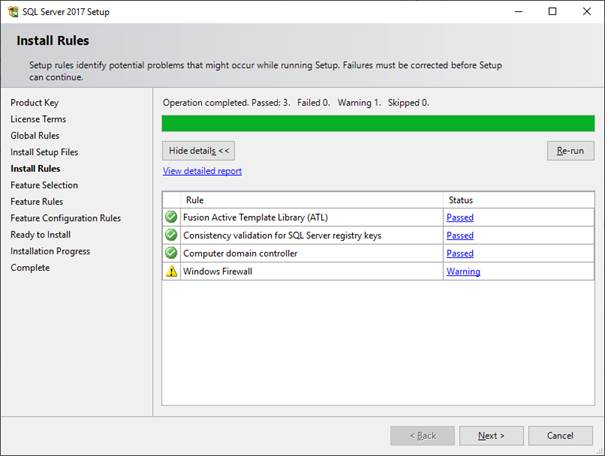
Afterwards, a check of the Install Rules will take place. Failures must be corrected before proceeding with the installation.
By clicking the status messages highlighted in blue for each rule, more detailed status information will be provided.
If the check has been successful, click Next>.
|
|
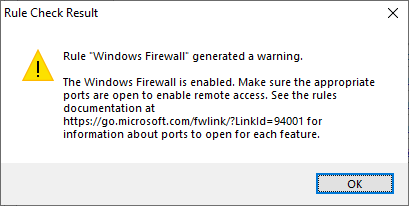
The warning concerning the Windows Firewall, which is displayed in the screenshot below, only highlights that the appropriate ports must be open to enable remote access when the Windows Firewall is enabled.
Click OK. |
|
|
|
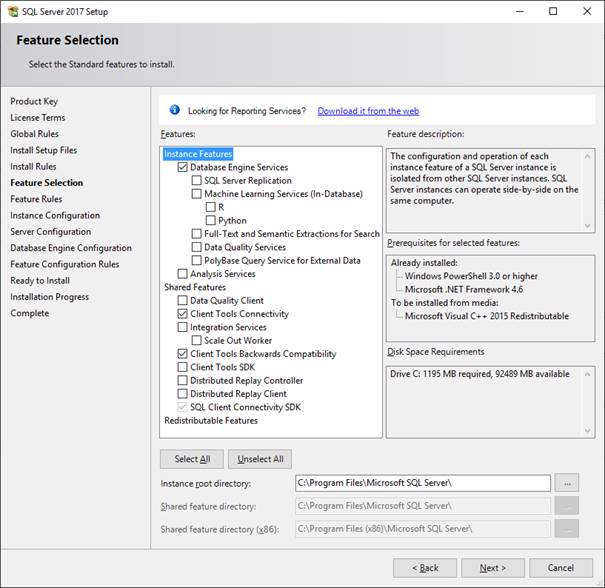
In the subsequent Feature Selection dialog, you have to select the following features:
Database Engine Services
Client Tools Connectivity
Client Tools Backwards Compatibility
SQL Client Connectivity SDK.
If required, you can change the installation path for these functions in this step. Please use the default path here and leave the dialog by clicking Next>.
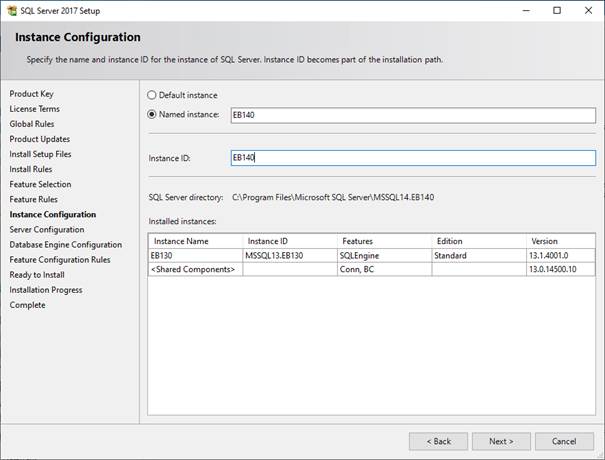
In the next step, the required SQL Server instance will be configured. For using SQL Server 2017 with Engineering Base, you may instantiate a Named instance with the name EB140. During the naming of the instance, the Instance ID will automatically be set to EB140. Should this not be the case, name this attribute accordingly.
Furthermore, it is also possible to change the path of the instance root directory. Also use the default path here and leave the dialog by clicking Next>.
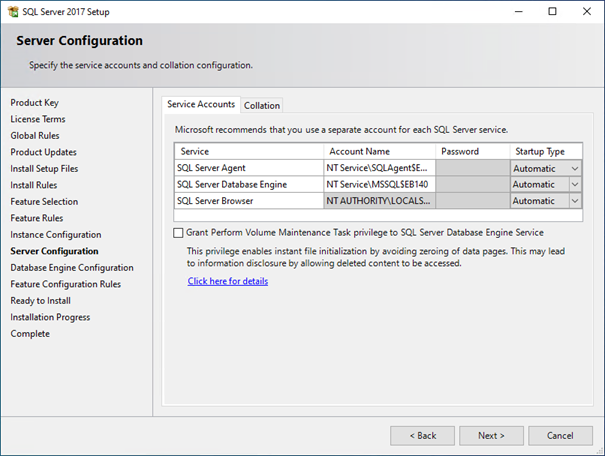
In the following step, the server configuration will be done. For this purpose, the account name NT Service\SQLAgent$EB140 and the startup type Automatic must be selected for the service SQL Server Agent.
For the service SQL Server Database Engine, the account name NT Service\MSSQL$EB140 and the startup type Automatic must be selected.
Click Next> to proceed with the setup.
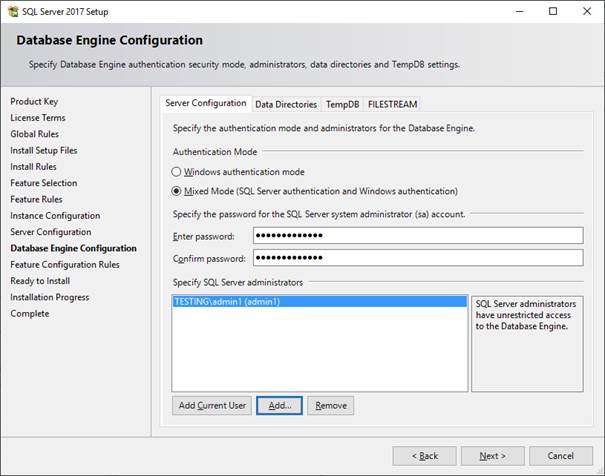
The Database Engine Configuration specifies the authentication mode and the administrators for the Database Engine. As authentication mode, the option Mixed Mode (SQL Server authentication and Windows authentication) has to be selected.
The password to be entered for the SQL Server system administrator (sa) account reads $$Auc0tec1985. Please note that this entry is case-sensitive!
Under Specify SQL Server administrators, please insert the names of all users who are to have unrestricted access to the Database Engine. It is recommended to at least enter the user who is running the ongoing installation.
To terminate the configuration, click Next>.
|
|
At least one user has to be specified as SQL Server administrator! |
As the last step before the start of the actual installation, a summary of the SQL Server features to be installed will be displayed. Verify these features again and click Install to start the installation of SQL Server 2017.

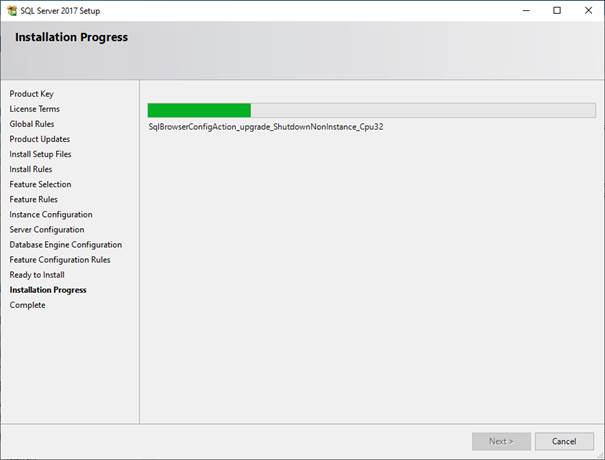
During the installation, the following installation status screen will be displayed which does not only show the installation progress, but also the currently executed operation. The installation of SQL Server 2017 will take several minutes.
Continue by clicking Next>.
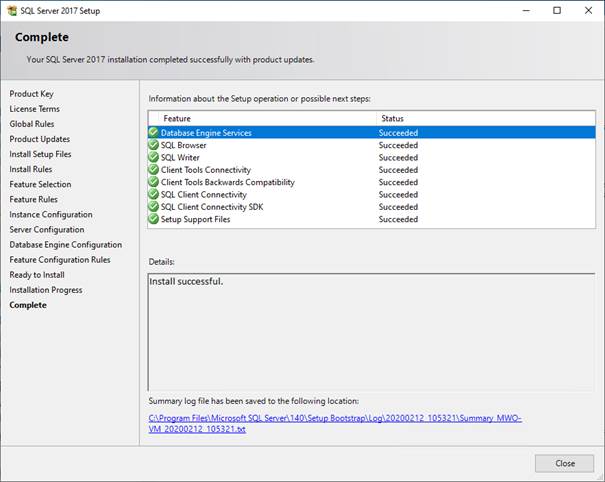
After the installation has been carried out, a summary of the installation process will be given. Here, any errors that may have occurred will be listed. Beyond that, there is the possibility to analyze the installation by means of the summary log file recorded during the installation progress.
Terminate the installation with Close.
|
|
Via these steps, the SQL instance has not yet been configured for Engineering Base. This will only be done via the installation of EB. To complete the installation properly, the EB application server needs to be installed at the least. If necessary, it may again be uninstalled afterwards. |
With this step, the manual installation of SQL Server 2017 has been completed successfully.