1 Manufacturing Harness Synchronisation
The Manufacturing Harness Synchronisation assistant serves to synchronize two harnesses. The synchronization between the source and target harness may be limited to selected modules or variants. Precondition for this option to work is that all elements of the harness are modularized (see Module Assignment Wizard).
To synchronize two harnesses
1. In the Explorer, select the project of the source harness.
2. Use Select Assistant from the context menu.
This opens the Assistant selection dialog.
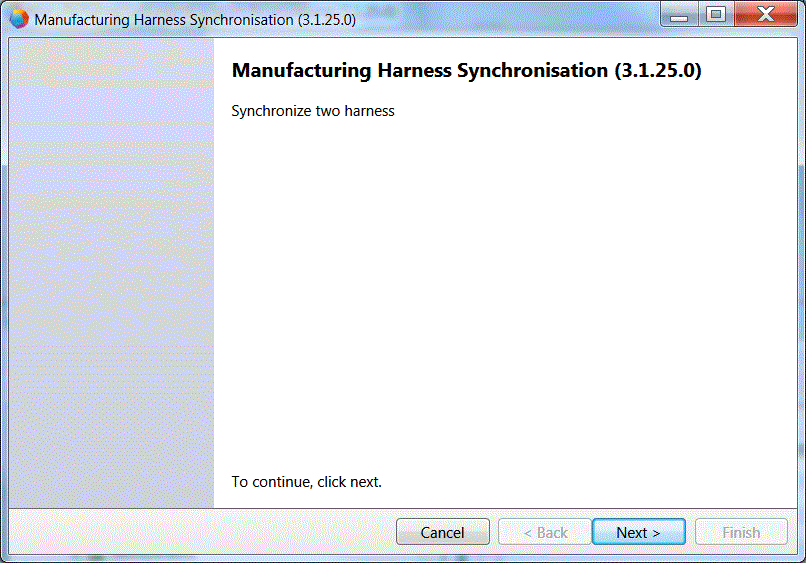
3. Select Manufacturing Harness Synchronisation and click Run.
This opens the dialog Manufacturing Harness Synchronisation.
4. Click Next >.
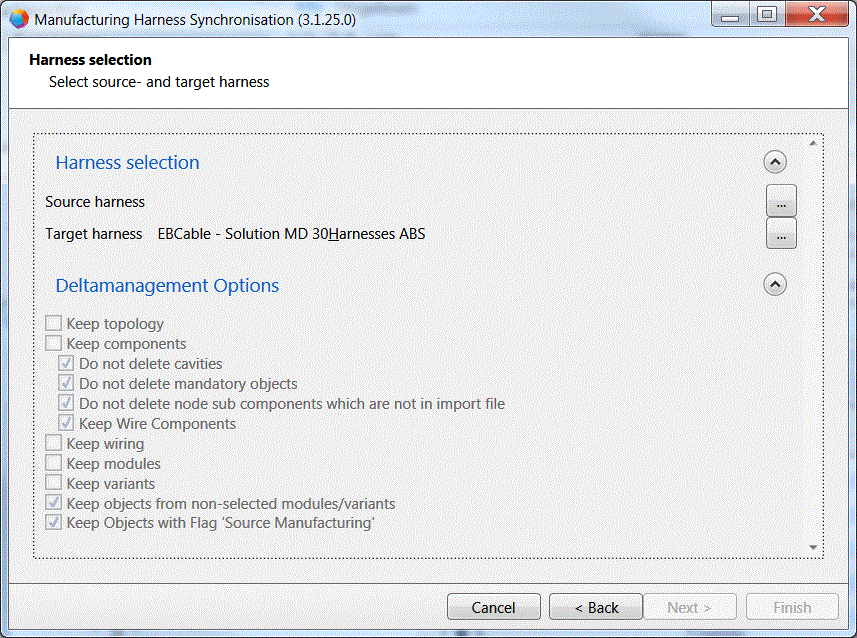
5. In the line Source harness, click ![]() .
.
This opens the dialog Harness selection.
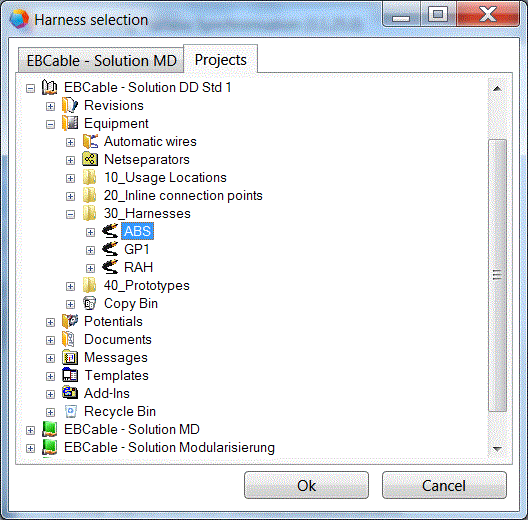
6. Click the tab Projects, if you want to select the source harness from another project.
7. Select the source harness and click OK.
8. In the line Target harness, click ![]() . Don't forget, to select in advance the radio button Target harness in Manufacturing Import/Export Wizard Settings below Synchronization using the assistant settings for the target project!
. Don't forget, to select in advance the radio button Target harness in Manufacturing Import/Export Wizard Settings below Synchronization using the assistant settings for the target project!
This opens the dialog Harness selection.
9. Click the tab Projects, if you want to select the target harness from another project.
10. Select the target harness and click OK.
11. Check the Deltamanagement Options you want to use.
12. Click Next >.
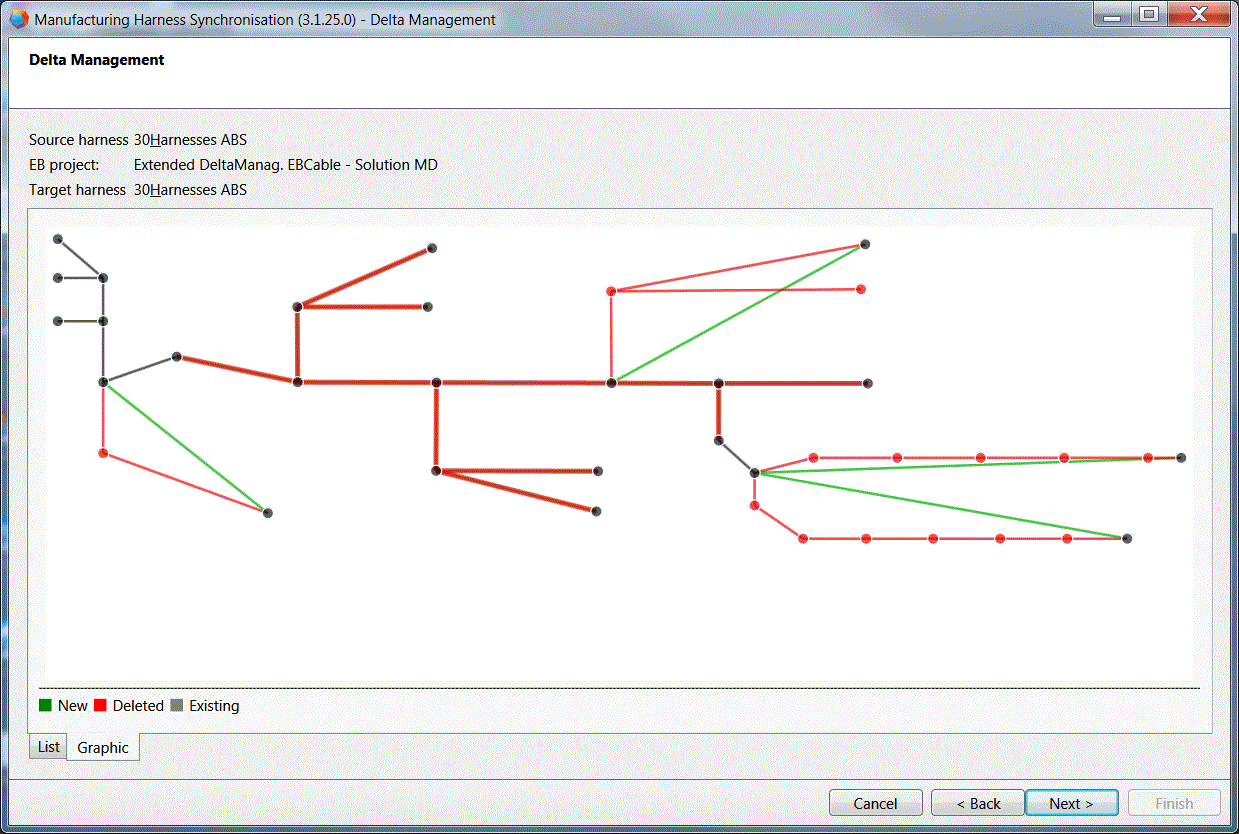
This opens the dialog Delta Management. It offers you an overview about the differences between the source and target harness. You may use this dialog to specify which aspects of the differences you want to include into the synchronisation process.

13. Check the structures or sub-structures of the harness to which you want to restrict the synchronisation process.
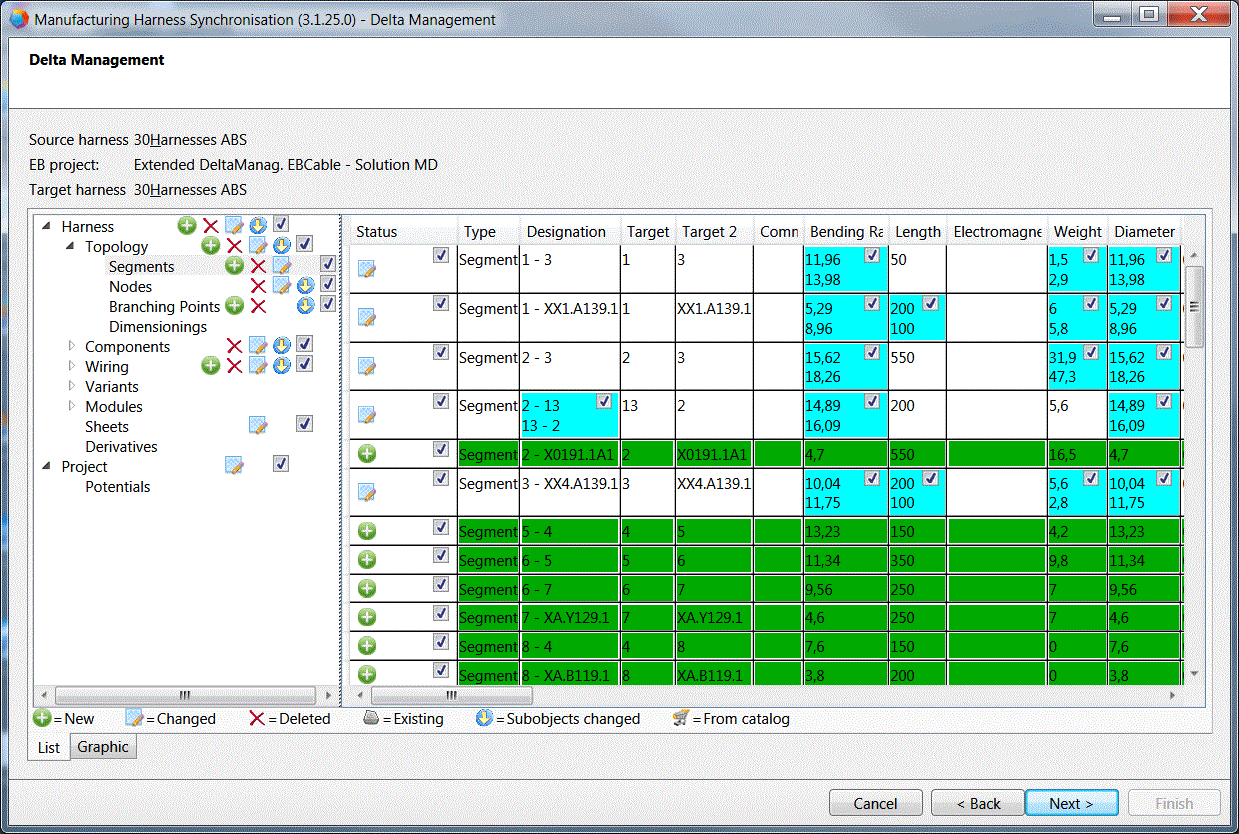
14. Click the tab Graphic below the dialog window to see the topology changes graphically.
The dialog Graphic opens.
15. Click Next >.
16. Check the graphic options offered below Graphic options you want to be applied.
17. Click Topology Editor, to open the Topology Editor.
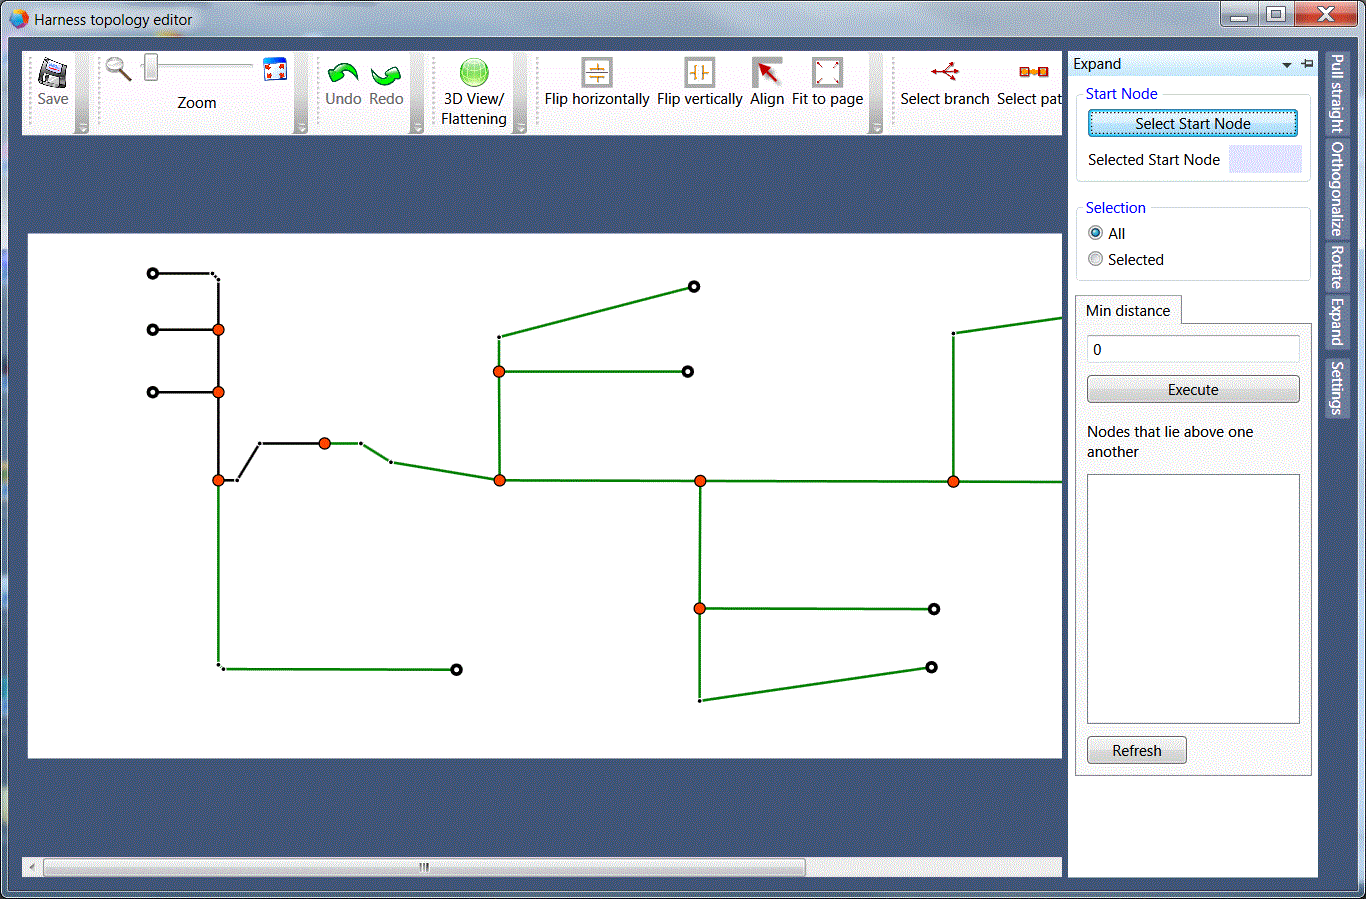
You may exclude parts of the topology using the Topology Editor.
18. Click Next > to start the synchronisation process.
Once the synchronisation process has terminated, the dialog Finished opens.
19. Check the reports or message objects you want to be created.
20. Click Finish.
The reports and the message objects may be found in the project below Messages -> Manufacturing Import Export -> <date> <time>.