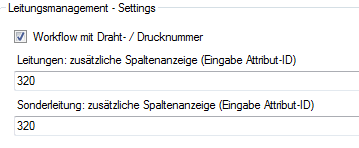
Figure 290 Wire management macro settings 1
8.22.6 Wire number assignment
Assigning numbers to wires
To assign a wire number, mark the desired wire and actuate the wire number assignment button.
To be able to unambiguously identify wires, they are assigned an unambiguous number that is valid beyond the wire harness. For this purpose a non-overlapping numbering range is defined.
The wire number assignment is started from the wires to be numbered, uses the existing module assignment to look for the appropriate number range and supports you in assigning suitable and unambiguous numbers.
If a wire belongs to several module families, then the area of the numerically smallest family is used.
You must not tick off the checkbox "Workflow with wire / print number" in the macro settings for wire management. (See also: Settings “Wire Management“)
|
Figure 290 Wire management macro settings 1 |
Example
Two components are connected via two connections, connection 1 gets the module "Standard" with a number range of 1 to 400, and connection 2 gets the module Comfort with a number range of 401 to 800.
The connection 1 then gets wire number 1 and the connection 2 the wire number 401 unless the wire numbers are already assigned.
Assigning print numbers to wires
In contrast to unambiguous wire numbers, you can also automatically determine a wire number by means of the potential assigned to the wire and an unambiguous numerical index.
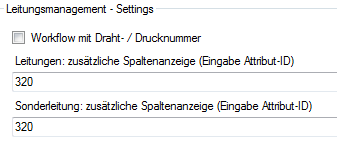
For this purpose you must tick off the checkbox "Workflow with wire / print number" in the macro settings for wire management. (See also: Settings “Wire Management“).
|
Figure 291 Wire management macro settings 2 |
At the same time the wire management describes the attribute Print number at the wire with the value of the same attribute at the potential.
Example
Two components are connected via a connection with the potential 310.000.
With the start of the wire management, a wire is placed on this connection. Since up to this point no wire with this potential was created, the wire number gets the name 310000_1.
The attribute Print number is assigned the value 310000.
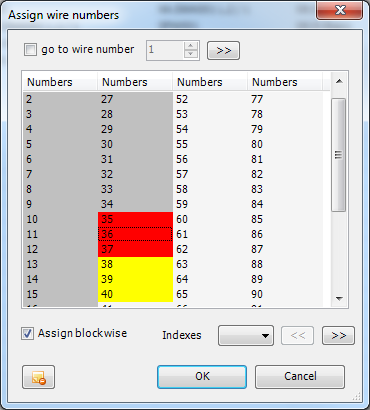
Figure 292 Dialog for wire number assignment
|
Button etc. |
Description |
|
Go to wire number |
This checkbox is active only for variant wire harnesses. Because individual number ranges cannot be assigned for these, this option enables you to work with an offset of your own. To avoid lengthy browsing, you can enter a target number here and jump there via the button |
|
Underlaid in gray |
Already assigned wire numbers (currently used) |
|
Underlaid in yellow |
Numbers proposed for currently edited wires. Upon actuation with OK they turn gray. |
|
Underlaid in red |
Deleted and thus blocked wire numbers. You can reassign them after a query. |
|
Assign blockwise |
If you are editing several wires at once, this controls whether these wires are to get consecutive numbers or whether any existing gaps are to be filled. |
|
Index |
Here you can use the drop-down list to select one of the specified letters as number index. If adopted, the number is then composed of the numerical part and the index. |
|
<< |
If it is not possible to show all wire numbers in the window, you can use this button to scroll back page by page. |
|
>> |
If it is not possible to show all wire numbers in the window, you can use this button to scroll forward page by page. |
|
|
You can use this button to reset all wire numbers present at the edited wires to the original state, i.e. "####". Wire numbers thus becoming available are then designated as deleted numbers. |